Saturday 14 July 2012

Crobots!!

What on earth is a Crobot?? I hear you ask. Logic dictates that it's a crocheted robot. A strange combination, definitely. The softly-textured, somehow old-fashioned craft of crochet clashes head-on with the metallic futuristic world of the robot. With adorable results.

My inspiration for this project came from this lovely book: Crobots, by Nelly Pailloux
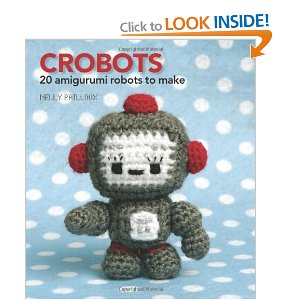
Image c/o Amazon.co.uk
However, I am pleased to say that apart from using and modifying one of the head patterns from the book, I actually made the rest of it up as I went along (the top hat was modified from another pattern I found).

I wanted to make a unique wedding gift for my friends who got married last month. They are big sci-fi fans, and particularly love robot imagery so I thought this was the perfect idea. I was completely daunted at first, as this was the first dimensional crochet project I have done, but I was very pleased with the results. I couldn't resist the cute Bride & Groom mugs to sit my little crobots in.


I crocheted a veil and a top hat, which is easier than it looks! Then made eyes from felt and sewed mouths, buttons etc with wool. I raided my scrapping stash for flowers, and a Tim Holtz fragment charm to use as a pocket watch (a technique I have used before).

I wasn't there when my friends opened the gift, but they were reportedly thrilled with them. Its always lovely to receive a handmade gift, and I am now pretty confident with dimensional crochet. Plus, they look so cute!!

Monday 21 May 2012

I'm a happy Hooker!!!

As some of you know, I've been off work for about 4 weeks now. Somehow I haven't felt in the mood for doing anything papery at all while I've been off. I've only made about 3 bits of jewellery too. The creative input needed for two of my favourite hobbies has somehow eluded me, but I hope when I get back on track I will feel inspired once again.
However, I have had something to keep me occupied. I've been learning to crochet. It's been satisfying my need for creativity without straining my brain! I did a sampler piece of a few different stitch types, then made this gift bag for a friend. I made the body of the bag using a few of the basic stitches, then a scalloped edge taken from the beginner's book I had bought, and a flower pattern that I found online.


I love the simplicity of crochet: once you have learned a few stitches, all patterns and designs are pretty much a variation of these. You can take it anywhere, just a ball of wool and a hook are needed, you can pick it up and put it down, and it doesn't take over the whole living room like certain other hobbies of mine!
Also, as any crafter knows, its fun to make things that are small and pretty! I'm hoping that I can make some cute flower embellishments, to use in scrapping and even jewellery making. I love taking different craft elements and fusing them into something unique.

Friday 4 May 2012

Networking!!

So I am venturing into the world of Twitter and Pinterest. I dont really know what I'm doing on either yet, but here are my links hopefully I will be updating with some vague degree of regularity :)

on twitter: @PaperCadillac


Hopefully my pinterest button is working now, I've had an issue or two...

Follow Me on Pinterest

Friday 27 April 2012

New Blog, People!

I've decided to move my jewellery to a separate blog, as I have made and sold a lot of pieces now that I'd like to share, and they'd be in danger of taking over this blog! I know most people that follow me here and that I follow, are papercrafters, but I'd love to drum up a bit of support for my new blog while it gets established.

I will, of course, be keeping up with my paper crafts and other bits and pieces on here too, so stay tuned...

http://cadillacgems.blogspot.co.uk/

Saturday 31 March 2012

Matchbox Madness!

Who knew altering matchboxes could be so much fun! I've had a great time getting to know some wonderfully mad people during the Matchbox Shrine swap on UK Scrappers.
Having checked out the swap and googled matchbox shrines, I thought this would be a piece of cake. Boy was I wrong! Firstly I signed up to swap 2 matchboxes, so twice the amount of work. Then I had creative block for weeks on end, my house is still littered with half-painted matchboxes as I bought several each of 3 different sizes to try out.

I was fascinated by all the different styles and interpretations of matchbox art that people made for this swap. What a creative bunch! I wanted to keep to the shape of the matchbox and the drawer-style opening rather than altering the boxes too much. I remembered making little paper theatres as a child, with layers of scenery and different characters, and I took inspiration from those for my boxes. I used two lovely Graphic 45 paper collections: Curtain Call and Halloween in Wonderland, with background papers from DCWV. I found the neatest finish on the boxes was to use black spray paint as an undercoat, and cutting panels of card for each side. The panels on the front of the boxes were mounted onto chipboard and my black inkpad got a good workout all over!

 I then set about cutting and layering all the internal pieces using a combination of foam pads and folded card posts, finishing with borders to enclose everything. With the music hall box, I added the same ribbon I'd used on the top of the box to make little theatre curtains.

I absolutely loved both the swaps I received in return, one (in fact, two) from Bex which has a saucy Burlesque theme, which is full of lovely touches and can be seen HERE , and one from Karen which is HERE that is a wonderful steampunky grungy number, full of lovely details and made to hang on the wall. Thank you both so much, and extra thanks to Bex for hosting the swap xxx


Edited to add: Link to Karen's matchbox :)

Tuesday 13 March 2012

Shhh! Chinese Whispers

My first time in a Chinese Whispers challenge/ circle and I'm quite excited about this. For those that don't know, a Chinese Whispers in scrapping terms is where someone sends a layout to another person, who scraplifts that LO, and sends their scraplift on to another person and so on. At the end its interesting to see how the LOs have evolved. There are about 10 of us in this particular one, and we all start with a LO and send it on to another person, so everyone has a layout to scrap each month. Does that make any sense? Would I be better off making a flow chart?! Haha!
I don't work from sketches very often so it will be interesting to see how I cope with all this scraplifting, but I sometimes get stuck in a rut for ideas so I hope it will help me think outside the box. This LO is the first one that I've sent on, and I've been sent a picture of a lovely layout that I need to get scraplifting! I'm looking forward to the inspiration and motivation I'll get from this.


The sketch I worked from is not my usual style, but I'm pleased with it all the same. I used MME papers and Bazzill dotted cardstock, tearing and inking the edges of the cardstock. The background paper I cut a large central square out of so as not to waste it all, so I could use it on the main picture, and the yellow patterned paper is the reverse of it, which I thought I'd never use! I didn't really like the chevron paper either, but it was really pretty made into a rosette with the Tim Holtz alterations die. I just added a few prima flowers and a kraft tag, with a little bit of doodling to finish off. I like the simplicity, not cluttered with journalling and crammed with embellishments, and when I get around to my scraplift I'll show you that too :)

Tuesday 6 March 2012

First Jewellery!

So I'm really enjoying making gemstone jewellery, having already bought loads more beads than I showed in my last post! (naughty! My gemstone addiction is just replacing my paper addiction as I've vowed not to buy any new papers!)
I've already sold a couple of the pieces, and hope to do a couple of craft fairs maybe at some point. I'd happily keep all the jewellery for myself, but I can't afford to fund this hobby if I do! Haha.
So I'd love to know what people think, and any ideas about what stones or colour schemes people would like to see if you were looking at a jewellery stall.

 Black Jasper pendant (love this leaf!) with pretty orange Carnelian, and mini Tiger's eye, picture Jasper and green Jade beads. Phew!


White Coral with red Jade illusion flower pendant, little bit of experimentation with the flower.


Lovely statement necklace in orange Jade and brown Agate. This will be a present for my Mum, she loves bold jewellery and orange, so I hope she likes it! 


Amethyst and lilac Pearl cuff with earrings. Lovely colour scheme for a prom or a wedding!


Purple Agate with Labradorite set. I've put my bracelets on stretchy elastic, as I hate fiddly bracelet clasps, and this has enabled me to sell them at low prices. They are proving very popular!


Coloured pearl and haematite earrings, really simple. I think I'll keep some of these!


Cute Dalmatian Jasper hearts, with coral and jade. Love this set, Dalmatian Jasper is one of my fave gems. It always amazes me that nature can produce such gorgeous patterns!
 
 So I've got some scrapping swaps and challenges to get on with, time to put down my pliers for a bit (easier said than done!) and go and fiddle with some matchboxes ...


Thursday 23 February 2012

Shiny Shiny pretty pretties!


I may not have time to do much paper stuff for a while, as I've just taken posession of this little bundle of loveliness! I keep just picking them up and touching and looking at them. Ooh. preciouses!

I've dabbled with a bit of glass and plastic bead jewellery over the years, very simple stuff, but I've always loved gemstones for their amazing natural bright colours and fabulous lustre. If I buy myself- or anyone else- jewellery, its usually gemstones in some form. So I thought, its about time I have a proper go at this. Even if I end up keeping all the stuff I make (though I wouldn't mind selling some so I can afford to buy more gems!) its still another string to my crafting bow.

I'll definitely be posting some pictures of them when I've made some! Though knowing me I'll be mulling over ideas for a while before I can bring myself to start. At least with beading, I can cut the wire and start all over again! Wish me luck :)


Wednesday 22 February 2012

Hats Off!

First I'd like to say how much fun this was. When I was at uni I'd make stuff like this often and wear it too (mini top hat=goth fashion staple!) I didn't have all the papercraft resources then that I do now so I was really able to experiment here.
 I've used quite a bit of Tim Holtz idea-ology here: grungeboard keyhole, key and wings, tissue tape and type charm. I've also used Papermania textured cardstock, chain and mini penny farthing charm from hobbycraft, and 7gypsies mini key.

When I first saw the type charms (they come with letter stickers) I thought they would make great mini pocket watches, and I've finally found a project to use it for. They would look great on a charm bracelet or as a pendant too.
The body of the hat was made from an old Lush pot, to give a funky inverted shape, and the base a fine corrugated card, which I found to be quite malleable. I covered with the brown cardstock, then sanded it (white core cardstock is useful here as it brings out the texture) I then covered all the edges and 2 grungeboard wings with tissue tape, and used antique linen distress ink to accent. I covered the key and keyhole with brown then metallic paint for a rusty look.
I thought about the normal netting/veiling you can get on these mini hats, but I only had black net, so I decided to try and utilise the chain that i'd made the charm from for a pretty effect. I just made holes in the brim, opened up a few chain links and used them to attach the main length of chain.

This piece is going in for the Grungy Monday 37 challenge, to create a piece of wearable art.
Thanks Linda for a great challenge!!!

Also, this will be my feb monthly make


Sunday 19 February 2012

Slushy Stuff part 2!

The second valentine's-related piece in 2 days. I confess, I'm a secret romantic. Don't tell anyone though, I've got a reputation to uphold!
The idea for this piece came from the great song, Erma Franklin's (Take another little) Piece of my Heart. Whilst listening to it, I started to mull over ideas for making a paper-pieced or patchwork
heart, which then evolved into the puzzle. Making the puzzle itself was much more complicated than it should have been: there was an awful lot of fiddly cutting. Next time, I might try picking up a cheap jigsaw puzzle from a charity shop and covering the pieces. A thousand-piece one should last a few projects!
I covered the puzzle pieces in various papers from the Tim Holtz lost and found paper stack, sprayed them with Tattered Angels glimmer mist in candy apple red and touched up the edges with a crimson promarker. I cut freehand a large and small tag from the lost and found paper, using the music sheet to reflect the song lyrics. I used linen distress ink on the tags then adhered the puzzle pieces to the large one, and stamped the lyrics on the small. The mini alpha stamps I used were from Studio G, a bargain £1.50, and so useful and quick. I found the organza ribbon and fibre thread in my stash, and looped them through punched holes to finish.
I'm entering this piece for the Studio L3 Grungy Monday valentine's theme challenge and the Simon Says Stamp & Show anything goes challenge
I love seeing other people's interpretations on a theme, and browsing through all the other entries is a great way to find new blogs to follow :)