Saturday, 14 July 2012

Crobots!!

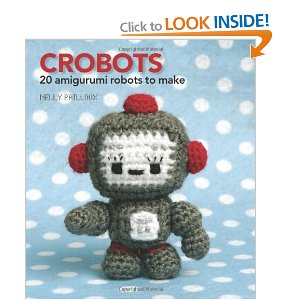
What on earth is a Crobot?? I hear you ask. Logic dictates that it's a crocheted robot. A strange combination, definitely. The softly-textured, somehow old-fashioned craft of crochet clashes head-on with the metallic futuristic world of the robot. With adorable results.

My inspiration for this project came from this lovely book: Crobots, by Nelly Pailloux
Image c/o Amazon.co.uk
However, I am pleased to say that apart from using and modifying one of the head patterns from the book, I actually made the rest of it up as I went along (the top hat was modified from another pattern I found).

I wanted to make a unique wedding gift for my friends who got married last month. They are big sci-fi fans, and particularly love robot imagery so I thought this was the perfect idea. I was completely daunted at first, as this was the first dimensional crochet project I have done, but I was very pleased with the results. I couldn't resist the cute Bride & Groom mugs to sit my little crobots in.


I crocheted a veil and a top hat, which is easier than it looks! Then made eyes from felt and sewed mouths, buttons etc with wool. I raided my scrapping stash for flowers, and a Tim Holtz fragment charm to use as a pocket watch (a technique I have used before).

I wasn't there when my friends opened the gift, but they were reportedly thrilled with them. Its always lovely to receive a handmade gift, and I am now pretty confident with dimensional crochet. Plus, they look so cute!!

Monday, 21 May 2012

I'm a happy Hooker!!!

As some of you know, I've been off work for about 4 weeks now. Somehow I haven't felt in the mood for doing anything papery at all while I've been off. I've only made about 3 bits of jewellery too. The creative input needed for two of my favourite hobbies has somehow eluded me, but I hope when I get back on track I will feel inspired once again.
However, I have had something to keep me occupied. I've been learning to crochet. It's been satisfying my need for creativity without straining my brain! I did a sampler piece of a few different stitch types, then made this gift bag for a friend. I made the body of the bag using a few of the basic stitches, then a scalloped edge taken from the beginner's book I had bought, and a flower pattern that I found online.


I love the simplicity of crochet: once you have learned a few stitches, all patterns and designs are pretty much a variation of these. You can take it anywhere, just a ball of wool and a hook are needed, you can pick it up and put it down, and it doesn't take over the whole living room like certain other hobbies of mine!
Also, as any crafter knows, its fun to make things that are small and pretty! I'm hoping that I can make some cute flower embellishments, to use in scrapping and even jewellery making. I love taking different craft elements and fusing them into something unique.

Friday, 4 May 2012

Networking!!

So I am venturing into the world of Twitter and Pinterest. I dont really know what I'm doing on either yet, but here are my links hopefully I will be updating with some vague degree of regularity :)

on twitter: @PaperCadillac


Hopefully my pinterest button is working now, I've had an issue or two...

Follow Me on Pinterest

Friday, 27 April 2012

New Blog, People!

I've decided to move my jewellery to a separate blog, as I have made and sold a lot of pieces now that I'd like to share, and they'd be in danger of taking over this blog! I know most people that follow me here and that I follow, are papercrafters, but I'd love to drum up a bit of support for my new blog while it gets established.

I will, of course, be keeping up with my paper crafts and other bits and pieces on here too, so stay tuned...

http://cadillacgems.blogspot.co.uk/

Saturday, 31 March 2012

Matchbox Madness!

Who knew altering matchboxes could be so much fun! I've had a great time getting to know some wonderfully mad people during the Matchbox Shrine swap on UK Scrappers.
Having checked out the swap and googled matchbox shrines, I thought this would be a piece of cake. Boy was I wrong! Firstly I signed up to swap 2 matchboxes, so twice the amount of work. Then I had creative block for weeks on end, my house is still littered with half-painted matchboxes as I bought several each of 3 different sizes to try out.

I was fascinated by all the different styles and interpretations of matchbox art that people made for this swap. What a creative bunch! I wanted to keep to the shape of the matchbox and the drawer-style opening rather than altering the boxes too much. I remembered making little paper theatres as a child, with layers of scenery and different characters, and I took inspiration from those for my boxes. I used two lovely Graphic 45 paper collections: Curtain Call and Halloween in Wonderland, with background papers from DCWV. I found the neatest finish on the boxes was to use black spray paint as an undercoat, and cutting panels of card for each side. The panels on the front of the boxes were mounted onto chipboard and my black inkpad got a good workout all over!

 I then set about cutting and layering all the internal pieces using a combination of foam pads and folded card posts, finishing with borders to enclose everything. With the music hall box, I added the same ribbon I'd used on the top of the box to make little theatre curtains.

I absolutely loved both the swaps I received in return, one (in fact, two) from Bex which has a saucy Burlesque theme, which is full of lovely touches and can be seen HERE , and one from Karen which is HERE that is a wonderful steampunky grungy number, full of lovely details and made to hang on the wall. Thank you both so much, and extra thanks to Bex for hosting the swap xxx


Edited to add: Link to Karen's matchbox :)

Tuesday, 13 March 2012

Shhh! Chinese Whispers

My first time in a Chinese Whispers challenge/ circle and I'm quite excited about this. For those that don't know, a Chinese Whispers in scrapping terms is where someone sends a layout to another person, who scraplifts that LO, and sends their scraplift on to another person and so on. At the end its interesting to see how the LOs have evolved. There are about 10 of us in this particular one, and we all start with a LO and send it on to another person, so everyone has a layout to scrap each month. Does that make any sense? Would I be better off making a flow chart?! Haha!
I don't work from sketches very often so it will be interesting to see how I cope with all this scraplifting, but I sometimes get stuck in a rut for ideas so I hope it will help me think outside the box. This LO is the first one that I've sent on, and I've been sent a picture of a lovely layout that I need to get scraplifting! I'm looking forward to the inspiration and motivation I'll get from this.


The sketch I worked from is not my usual style, but I'm pleased with it all the same. I used MME papers and Bazzill dotted cardstock, tearing and inking the edges of the cardstock. The background paper I cut a large central square out of so as not to waste it all, so I could use it on the main picture, and the yellow patterned paper is the reverse of it, which I thought I'd never use! I didn't really like the chevron paper either, but it was really pretty made into a rosette with the Tim Holtz alterations die. I just added a few prima flowers and a kraft tag, with a little bit of doodling to finish off. I like the simplicity, not cluttered with journalling and crammed with embellishments, and when I get around to my scraplift I'll show you that too :)

Tuesday, 6 March 2012

First Jewellery!

So I'm really enjoying making gemstone jewellery, having already bought loads more beads than I showed in my last post! (naughty! My gemstone addiction is just replacing my paper addiction as I've vowed not to buy any new papers!)
I've already sold a couple of the pieces, and hope to do a couple of craft fairs maybe at some point. I'd happily keep all the jewellery for myself, but I can't afford to fund this hobby if I do! Haha.
So I'd love to know what people think, and any ideas about what stones or colour schemes people would like to see if you were looking at a jewellery stall.

 Black Jasper pendant (love this leaf!) with pretty orange Carnelian, and mini Tiger's eye, picture Jasper and green Jade beads. Phew!


White Coral with red Jade illusion flower pendant, little bit of experimentation with the flower.


Lovely statement necklace in orange Jade and brown Agate. This will be a present for my Mum, she loves bold jewellery and orange, so I hope she likes it! 


Amethyst and lilac Pearl cuff with earrings. Lovely colour scheme for a prom or a wedding!


Purple Agate with Labradorite set. I've put my bracelets on stretchy elastic, as I hate fiddly bracelet clasps, and this has enabled me to sell them at low prices. They are proving very popular!


Coloured pearl and haematite earrings, really simple. I think I'll keep some of these!


Cute Dalmatian Jasper hearts, with coral and jade. Love this set, Dalmatian Jasper is one of my fave gems. It always amazes me that nature can produce such gorgeous patterns!
 
 So I've got some scrapping swaps and challenges to get on with, time to put down my pliers for a bit (easier said than done!) and go and fiddle with some matchboxes ...


Thursday, 23 February 2012

Shiny Shiny pretty pretties!


I may not have time to do much paper stuff for a while, as I've just taken posession of this little bundle of loveliness! I keep just picking them up and touching and looking at them. Ooh. preciouses!

I've dabbled with a bit of glass and plastic bead jewellery over the years, very simple stuff, but I've always loved gemstones for their amazing natural bright colours and fabulous lustre. If I buy myself- or anyone else- jewellery, its usually gemstones in some form. So I thought, its about time I have a proper go at this. Even if I end up keeping all the stuff I make (though I wouldn't mind selling some so I can afford to buy more gems!) its still another string to my crafting bow.

I'll definitely be posting some pictures of them when I've made some! Though knowing me I'll be mulling over ideas for a while before I can bring myself to start. At least with beading, I can cut the wire and start all over again! Wish me luck :)


Wednesday, 22 February 2012

Hats Off!

First I'd like to say how much fun this was. When I was at uni I'd make stuff like this often and wear it too (mini top hat=goth fashion staple!) I didn't have all the papercraft resources then that I do now so I was really able to experiment here.
 I've used quite a bit of Tim Holtz idea-ology here: grungeboard keyhole, key and wings, tissue tape and type charm. I've also used Papermania textured cardstock, chain and mini penny farthing charm from hobbycraft, and 7gypsies mini key.

When I first saw the type charms (they come with letter stickers) I thought they would make great mini pocket watches, and I've finally found a project to use it for. They would look great on a charm bracelet or as a pendant too.
The body of the hat was made from an old Lush pot, to give a funky inverted shape, and the base a fine corrugated card, which I found to be quite malleable. I covered with the brown cardstock, then sanded it (white core cardstock is useful here as it brings out the texture) I then covered all the edges and 2 grungeboard wings with tissue tape, and used antique linen distress ink to accent. I covered the key and keyhole with brown then metallic paint for a rusty look.
I thought about the normal netting/veiling you can get on these mini hats, but I only had black net, so I decided to try and utilise the chain that i'd made the charm from for a pretty effect. I just made holes in the brim, opened up a few chain links and used them to attach the main length of chain.

This piece is going in for the Grungy Monday 37 challenge, to create a piece of wearable art.
Thanks Linda for a great challenge!!!

Also, this will be my feb monthly make


Sunday, 19 February 2012

Slushy Stuff part 2!

The second valentine's-related piece in 2 days. I confess, I'm a secret romantic. Don't tell anyone though, I've got a reputation to uphold!
The idea for this piece came from the great song, Erma Franklin's (Take another little) Piece of my Heart. Whilst listening to it, I started to mull over ideas for making a paper-pieced or patchwork
heart, which then evolved into the puzzle. Making the puzzle itself was much more complicated than it should have been: there was an awful lot of fiddly cutting. Next time, I might try picking up a cheap jigsaw puzzle from a charity shop and covering the pieces. A thousand-piece one should last a few projects!
I covered the puzzle pieces in various papers from the Tim Holtz lost and found paper stack, sprayed them with Tattered Angels glimmer mist in candy apple red and touched up the edges with a crimson promarker. I cut freehand a large and small tag from the lost and found paper, using the music sheet to reflect the song lyrics. I used linen distress ink on the tags then adhered the puzzle pieces to the large one, and stamped the lyrics on the small. The mini alpha stamps I used were from Studio G, a bargain £1.50, and so useful and quick. I found the organza ribbon and fibre thread in my stash, and looped them through punched holes to finish.
I'm entering this piece for the Studio L3 Grungy Monday valentine's theme challenge and the Simon Says Stamp & Show anything goes challenge
I love seeing other people's interpretations on a theme, and browsing through all the other entries is a great way to find new blogs to follow :)

Saturday, 18 February 2012

Slushy stuff!


 I received the most beautiful flowers from my sweetheart for Valentine’s Day. Though I must give him credit, he often buys me flowers, the dark tulips and white roses were a lovely combination.
I was very stuck on this layout to start with: I didn’t want to detract from or overpower the flowers, but I wanted a dramatic and romantic piece too. I thought I might use a little piece of the DCWV 12x12 photo stack red roses paper, but in the end I went big with it instead and I’m glad I did. I like the fact that this piece evolved: I wasted paper cutting pieces I didn’t use in the end, but it’s all part of the process. I also considered at one point using the whole of the paper cellar die-cut hearts sheet, but it looked very pretty cut up as a photo mat. I only wish I’d realised earlier it was self-adhesive as I struggled to try and glue it neatly…silly me!
I don’t get too hung up on journalling if I just have a little to say: sometimes the title is enough. For some reason I stamped the writing straight onto my LO when I’d nearly finished everything else, instead of doing it first: brave? Or stupid? Haha. Either way, it worked, and the fact that I used an inky grungy font anyway meant it wouldn’t have mattered if it had been a little messy. The writing is quite subtle and blends into the background somewhat, but this is what I was trying to achieve. To me, it mimics the words, “the closer I look…” because you have to look a little closer to see.
I was inspired by the Feb week 2 team challenge on UKScrappers, and also by the  SJ Crafts february challenge so I put together a combination of the two. Thanks for the lovely inspiration!

Friday, 10 February 2012

Two Girly Cards

This is the kind of girly I can cope with - no fluffy bunnies or anything too cutesy! I'm sharing a couple of cards- one quick, one that took a bit longer. The more time-consuming one, I made last year. It was the first one I made with my Tim Holtz birdcage die- now a firm favourite. Though I made it before I started blogging, I was always in the habit of snapping my favourite cards in case I wanted to go back for inspiration later. Sometimes its hard to give them away! But obviously as this one was personalised, it wasn't too hard to part with.
I actually used a freebie paper from a magazine for the background. You never know when they might come in handy so I never throw them away (who am I kidding? I never throw anything away!) So I used the TH birdcage and vintage market alphabet dies, the bird and letters are cut from the First Edition desert blooms paper stack. The hanging charms and flower are from Making Memories. A lot of input from my trusty promarkers, especially the Coral.

The second card was a cutting-and-piecing quickie for the 52-week card challenge. The paper is all from the DCWV 8x8 Street Lace stack. I love the lace and net look of these papers, very vibrant but a little bit saucy and naughty. The stack also has green, turquoise and cream papers as well as the pink, all have the black lace theme going on. I'll definitely be using this stack up quick! My black versacolor inkpad got a workout too, and my fingers were pretty sore after all that cutting!

Thursday, 9 February 2012

Altered Mini Album Tin


This mini scrapbook-in-a-tin is yet another thing I've had for aaages and not known what to do with!
I’ve decided to do a bit of a step-by-step on this project rather than just snap the finished piece so folk can see what i did. I used the following:
*Book pages (I used some pages from a 1950s science publication – I collect old science textbooks and journals – they were already coloured with age and I like the added provenance they give, even though only I know they are there. You can use a page-effect paper, or age pages using inks).
*Woodware scrapbook in a tin (pages are ~12x12cm). 
*Stamps- Kaisercraft clear alpha stamps –“Grunge” font; Pink Paislee “daily junque” clear stamp sheet. *Black VersaColor inkpad. *Graphic 45 Steampunk Debutante 8x8 paper pad. *Tim Holtz idea-ology fragments charms. *Making Memories jewel charms. *Ranger alcohol ink “Stream” 
*Inkssentials Glossy Accents.*Brown & gold ribbon, buttons. I love buttons!


1. Rip up your book pages. I found using genuine old pages meant they ripped nicely, absorbed glue well and folded nicely over edges/corners. Glue to the lid of your tin to cover it. If your paper is new and won’t get round awkward edges, try Tim Holtz tissue tape on the sides. Leave to dry.
2. Ink with the teal alcohol ink as much or as little as you like.  Stamp directly onto tin with daily junque stamps and spell out “time flies” with alpha stamps.
3. Stamp the clock with wings onto a separate sheet, ink the clock and add glossy accents.
4.  Add the brown ribbon, buttons and cut-out lady from the Steampunk Debutante papers.
5.  When the glossy accents is dry, add clock to layout. I used thinned-down clear glue, which reduces wrinkling and I also applied it over the clock to help it blend to the page. Because its thinned-down, it won’t leave a shine.
6.  Cut around a metre of gold ribbon (check length by wrapping it round as many times as you would like). Make 2 mini tags by gluing images from the Steampunk papers to the Tim Holtz fragment charms. Leave to dry and cut around the charm. Poke a hole through and thread onto ribbon. Finish the ends of the ribbon by knotting a jewel charm onto each end. Tie around your tin.

Done :) I haven't decorated the album pages yet, but when they are done they will be here too.

I have submitted this piece for a challenge here: Simon Says Stamp & Show
this blog is a great place for lovers of altered art and grungy crafts!
.
Saturday, 4 February 2012

Monthly Makes for January


I've been relatively productive this month, taking part in scrapping and card challenges on the UKS forums. I also decided to join in the Monthly Make for 2012 on the Felt Fairy's blog (see badge at the bottom of my blog). This month I have made my first ever ATCs, for a swap, and a card that I can now put up because the person I sent it to should have got it by now!

ATCs represented a completely new challenge for me: being creative in such a small space. When I scrap, I tend to leave space rather than fill pages up too much, but being able to fit everything I wanted onto a little card was a challenge for sure. I made a series of 6, entitled "Secrets in Lace", and 5 have been swapped; I kept the first one as I thought it might be nice to hang on to my first ever ATC. I'd be happy to make one-offs or more series if anyone wants to do a swap, just let me know.

 This card was really fun to make, it came out more like a scrapbook layout than some of my cards, but it was for a lovely friend so I wanted to spend a bit more time on it, hence I've used more techniques, more layers than I usually would: inking, stamping, die-cutting, collage. I liked the contrast of the girlie pastel dress and bunting against the aged feel of the stamped background.
Now I'm on a roll with my cardmaking I'm starting to enjoy it more, like I used to when I first started. I think taking inspiration from scrapping has really helped so I'll try and keep up with the 52 card challenge for the rest of the year!!

Thursday, 19 January 2012

Kitschy Kitchen


Recipe album kit by Melissa Francis: Kitschy Kitchen...the name says it all!

I found this cute kit in my stash after having bought it ages ago- typical me! And as my favourite recipes are mostly scribbled on scraps of paper and chucked in a kitchen drawer I thought it was about time I did something about it. 

As well as the album, I’d bought some of the coordinating bits: tags, cardstock stickers and extra recipe cards: they definitely added a little something. As an experienced crafter I felt afterwards that I could have easily made this album up myself with a couple of D-rings, some chipboard and a few papers, which would have been cheaper and given me more creative freedom (the covers come already printed), but I like how it turned out and that’s the main thing! 

I added some of my own ribbon, a frame sticker and a paper doily to the album to personalise it more. I’m not usually one for kits, but this one was fast and fun so maybe I’ll try a few more…

Friday, 6 January 2012

Scrap-Happy!


 I've always been into papercrafts, but started scrapbooking in earnest about a year ago. Due to time constraints, I haven’t managed to complete that many layouts, but I've had real fun putting pages together, preserving photos in a way that will be lovely to look back on in years to come! The two layouts here are from photos about 4 years old but scrapped at the end of 2011. I have included vintage styling in both, but the effect is completely different! 

With neutral colours and lots of stamping and distress inking, the Mad as a Hatter layout looks like an old piece. There is hidden journalling and another photo behind the main picture: I love to include interactive elements in pages. On both pages I've used Graphic 45 and Tim Holtz products. Both brands are great for vintage-look/ distressed-look pages, Graphic 45 producing exquisite papers, and Tim Holtz specialising in altered art products. I wanted a dramatic look for the Love Story layout, so while the page elements are still mainly in a neutral colour, a black textured background was used, with red accents to compliment the photo. I've also included some mushy journalling about my friends in the photo!

I didn’t want to fill up my posts with product and technical info, but if anyone would like information about the specific products or techniques used, I’m happy to share. Also, this is the first time I've photographed my scrapbook pages, so I'm still getting used to that and the photography isn't great! Still, you get the idea. Now I’m off to think up some scrappy ideas for the collection of Graphic 45 papers I bought recently, gorgeously entitled Steampunk Debutante!

Monday, 2 January 2012

Dressing Marilyn

For Christmas I received, after more than a little hinting, the beautiful book "Dressing Marilyn: How a Hollywood icon was styled by William Travilla", by Andrew Hansford. I'd seen it in a bookshop, rifled through and thought "Ooh, lovely pictures," but when I started to read the book it opened up a whole different world.

The golden age of Hollywood was all about its stars; big names, big movies, the transition from evocative black-and-white to glorious Technicolor. But how often do we think about what goes on behind the scenes? How many average movie fans have even heard of William Travilla? Yet without him, Marilyn Monroe could have faded into obscurity long ago. Without the couture of Travilla adorning her curves, maybe Max Factor wouldn't have decided she needed a striking platinum blonde do to complement her wardrobe? Without that white Travilla dress and that scene from the Seven Year Itch, what iconic shot of Marilyn, if any, would replace it?

I'm still in the process of reading this book, but for me the most interesting part has been the introduction and biography about Travilla, his life and early work. When one looks a little deeper into the stories behind these dresses, one realises that while it is certainly a glamorous career to dress the likes of Monroe, Jane Russell, Elizabeth Taylor and so on, it is not all silk, sequins and fairytales. There is little in the way of bohemian fancy-free artistry here: each garment is a precision-engineered piece of technical wizardry, keeping Ms Monroe's famous assets in check. The lovely thing is that these parts are photographed as well: an inbuilt girdle here, a steel bone there. And it was not until the structure of the dress was perfect could the sumptuous fabrics and exquisite artistry be brought into play. 

As a fan of Marilyn Monroe, this is a great book. But as someone with a love of the styles of the golden age of Hollywood and a fascination with both the technicality and beauty of costume, it really is exceptional.